Migrating a WordPress website using Installatron is a relatively straightforward process. Installatron is a popular application installer that many web hosting providers use to simplify the process of installing and managing web applications like WordPress.

Installatron is able to import local (same server and hosting package) or remote (different server or hosting package) application installations.

For the purposes of this article, we will walk through importing both a local and remote WordPress site into Installatron – the process is similar for all other applications supported by Installatron.

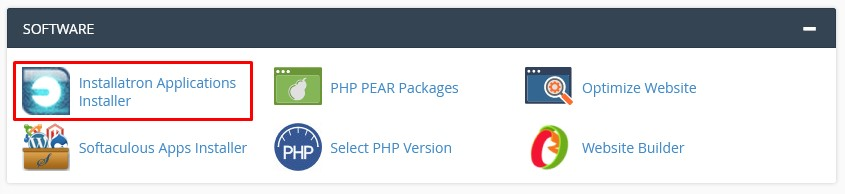
Here are the steps to migrate a WordPress website using Installatron: Open the Installatron Applications Installer from the Software section of cPanel.

HOW TO MIGRATE A WORDPRESS WEBSITE USING INSTALLATRON

These initial steps are the same whether you’re doing a local or remote import.

Type the name of the application you’d like to install in the search box – in this case WordPress and click return to search.

With WordPress selected, click the three-line menu drop-down button and then click import existing install.

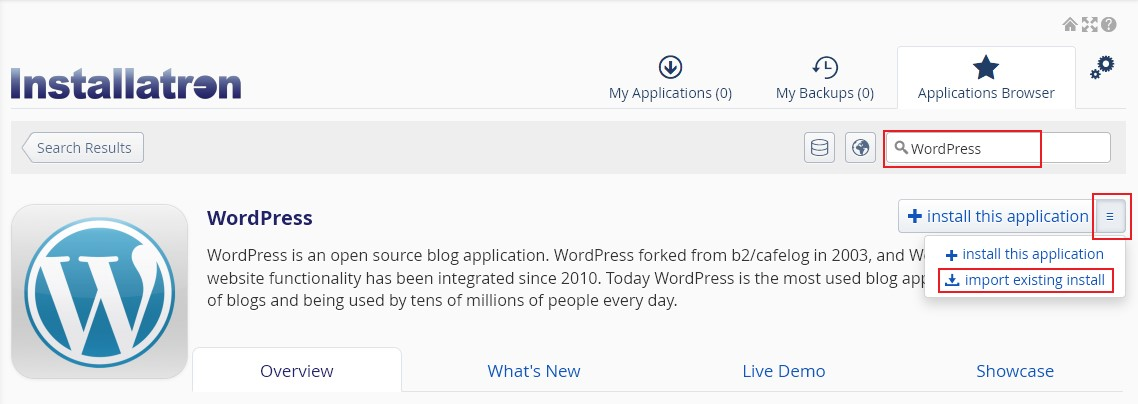
Now follow either the Local Import or Remote Import instructions below as appropriate.

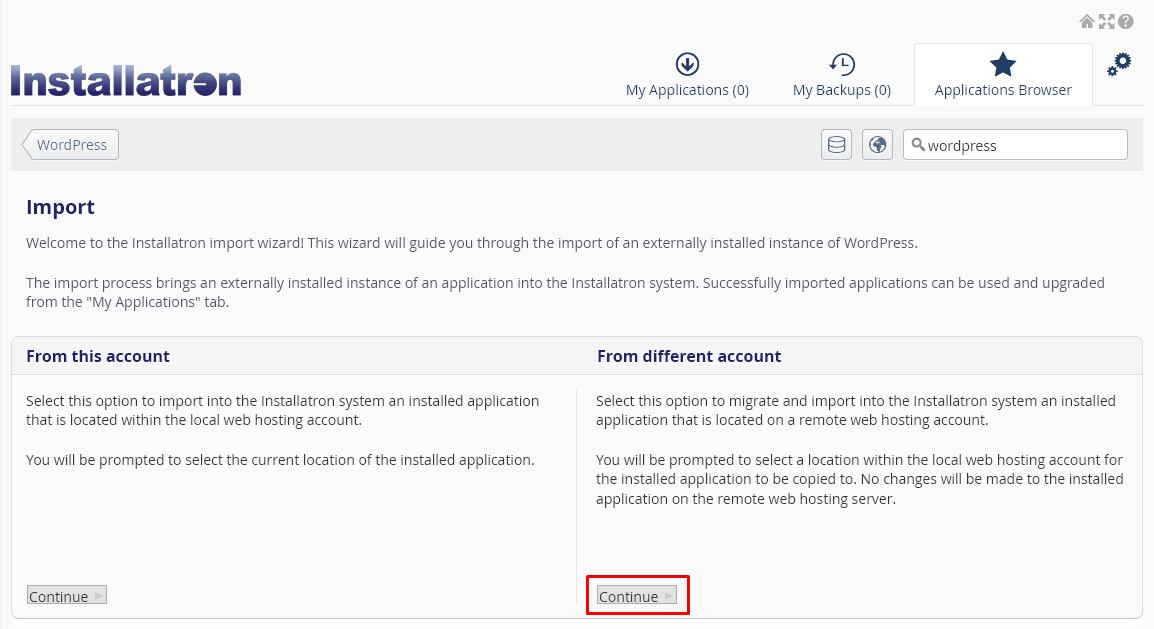
Remote Import (Migrate from another Provider) 

From the Import screen click Continue underneath the From this account column.

The Remote import screen is in two sections – Source followed by destination.

Enter the required Source details:

URL – the location of the installed application to be migrated

URL IP Address (Optional) – the IP address that the source URL should resolve to. Leave this blank if the source correctly resolves via DNS.

FTP Information – It’s important you know, and enter the correct FTP connection information here. Using incorrect details will result in an error and your import will not complete.

Protocol – select the protocol specified by the remote server
Server (IP Address or Hostname) – the IP address or hostname of the remote server
Port – the FTP port – usually set when selecting the Protocol – but can be changed here if you’re using a non-standard port
Username – the full FTP username
Password – the FTP password
Path – enter the path from the accounts root directory (or where you get dropped after FTP login) to the install location

Then enter the required Destination details:

Domain – select the domain you’d like the application to be served from once imported.

Directory (optional) – usually left blank to serve the imported site directly from the domain – but can be entered to serve the site from a directory

Database Management – choose whether to let Installatron create a new database for the imported application, or choose an existing database.

Click Import to complete the process.

Once the import has been successfully completed you’ll see the site listed with your My Applications dashboard with three links

Was this answer helpful? 319 Users Found This Useful (0 Votes)